Shuga' Mommas

Shuga’ Mommas: Chocolate Cake

True or false:

1. You like cake.
2. You’re short on time.
3. You hate baking.
4. You love baking.
5. You want to make a cake but you’re out of eggs and butter.
5. You have a weakness for chocolate and when there’s none in your house things can get ugly.
6. You need an easy vegan cake recipe.

If you answered true to the first and any of the following statements, this recipe is worth checking out. It ticks all the boxes and can be made with pantry staples. That’s it. Nothing refrigerated. This means as long as you keep your pantry stocked, whenever your sweet tooth cries out, you can have your cake and eat it too.

There are many reasons to love this recipe. It’s the edible equivalent of a machine washable, not too fancy, not too plain, oh-so-comfortable little black dress: suitable for a variety of occasions, versatile with minimal effort and cost effective. It’s incredibly quick, easy and perfect for a lean budget.

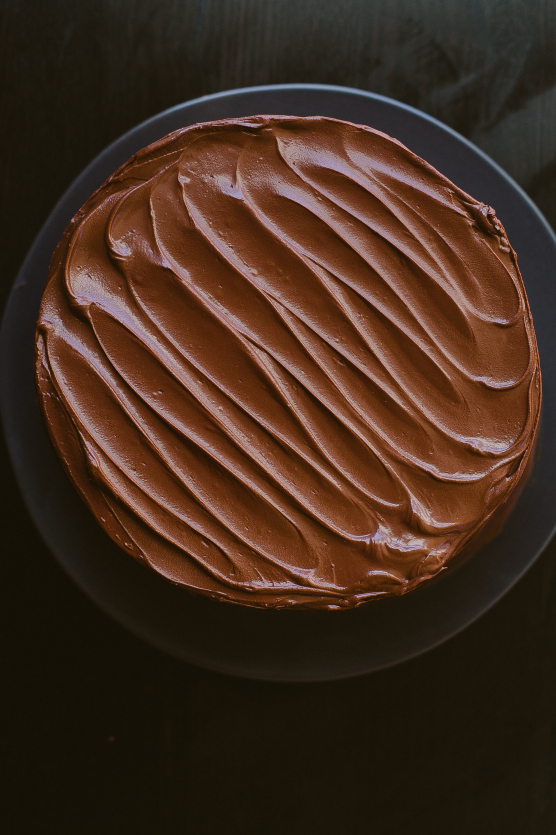
I made a cake like this to earn my baking badge as a girl scout. Years later I discovered it again on one of my favourite food blogs as I was prepping for my son’s birthday party. It is now my fall-back midweek dessert and the rainy day activity my son enjoys most. Most of the time I don’t bother with the icing though it is very, very tasty. You choose.

I’ve since modified the recipe from Not Without Salt to suit my need for a more intense chocolate flavour. I also cut the quantities to only fill one pan because honestly, if I made two cakes every time a craved chocolate, I would need to buy a new wardrobe. Chocolate makes my clothes shrink.

This modified recipe is best for an 8″ square pan or a 9″ round.

Chocolatecake
Credit

Ready? This is too easy.

Pre-heat your oven to 350 F/175 C. (If you’re using a convection oven, 325 F/170 C)

Grease your pan and line the bottom with parchment. If you intend to eat it straight out of the oven, don’t bother. (No judgement here. You’re in good company.)

Measure the following into a large mixing bowl:

1.5 cups of flour
1 cup sugar
1/4 cup cocoa
1 tsp baking soda
1/2 tsp salt
1 cup chocolate chips (optional but highly recommended)

Combine the following in a separate liquid measuring cup:

1 cup coffee (I use the leftovers from the french press. Instant coffee is fine in a pinch.)
6 Tbsp vegetable oil
1 Tbsp white vinegar
1 tsp vanilla extract

Pour the liquid ingredients into the large bowl of dry ingredients and combine with a whisk until the batter is homogenous.

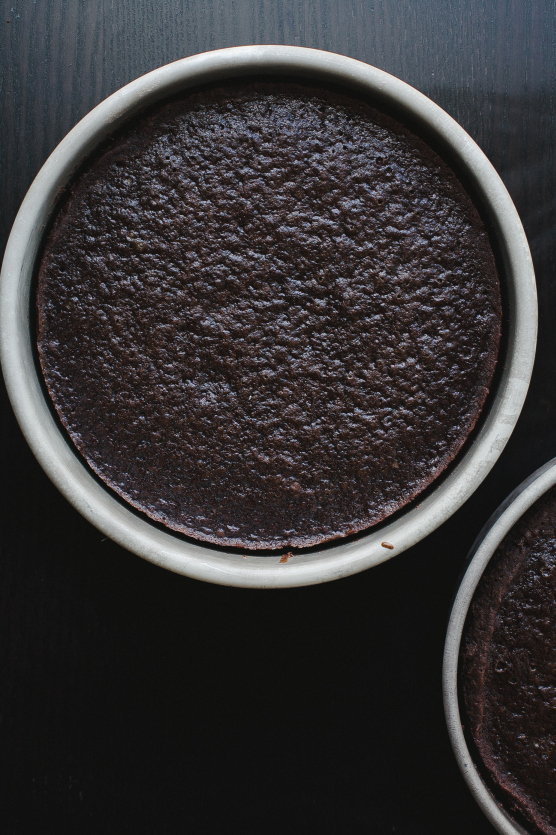
Pour the batter into your pan, pop it in the oven for 30-35 minutes and enjoy. If you need help checking for doneness, here’s some advice.

Frosting
Credit

Just like a reliable little black dress, the possibilities are endless. Last time I added 2 tsp of cinnamon and 1/4 tsp of cayenne pepper and called it a Mexican Chocolate cake. It was delicious. Try layering it with Nutella. Play with fresh cream and preserved cherries. Blitz fresh mint into a simple buttercream. It is hard to mess this up. Even if you do, at least you won’t have wasted stipend money on butter and eggs. I hope you like it.

chocolatefrosting
Credit

-From the kitchen of Elissa Watts

Shuga' Mommas

Shuga’ Mommas: Recipe for Success, and Chilli Mac!

My husband has been going through a particularly busy patch with grad work this semester and while it is safe to say that I do see him off to work every weekday morning, our time to spend together has all but dwindled to about an hour and a half in the evenings. We make the most of this meaningful time, though: this is when we cook dinner!

Cooking for me is a fairly new endeavor. My husband deserves the accolades for cooking in the past but, given our current season of life – I was excited to step up to the plate (ha!), and have started creating our weekly dinner menus. Because of this, I truly look forward to this time together because it not only gives us a set “dinner date” nearly every night of the week, but also has given me the confidence to do something that I was so weary of before. Sure, we eat a little later than most, but the time we get to spend in the kitchen and subsequent dinner together is totally worth it. I’m even finding that I love all this cooking going on in my kitchen! :-)

The first recipe I want to share is one of our recent favorites. We can usually save some for a following evening because there’s definitely enough for leftovers.

One Pot – Vegetarian Macaroni Chili

chillimac

Ingredients:

  • 1 Tbs Olive Oil
  • 1 small yellow onion, diced
  • 1 jalapeno, chopped
  • 1 green pepper, diced
  • 3 fresh garlic cloves, minced
  • 1 lb. ground veggie crumbles or ground turkey (I use Lightlife: Smart Ground)
  • 2 Tbs chili powder (I used powdered red chile, found at Whole Foods)
  • 2 tsp taco seasoning (optional)
  • 1 tsp cumin
  • 1 tsp salt
  • 2 cans (15 ounces each) stewed tomatoes
  • 1 can rinsed black beans
  • 1 ½ Cups macaroni noodles
  • 2 ½ Cups water
  • 1 Cup shredded cheddar cheese, plus more for topping

Instructions:

  1. In a large pot (I used a dutch oven) heat olive oil over medium heat. Add onion, jalapeno, green pepper, and garlic. Sauté until softened, approximately 2-3 minutes.
  2. Add veggie crumbles or turkey and break into small pieces. Cook until brown.
  3. Add chili powder, taco seasoning, cumin, salt, tomatoes, beans, noodles, and water. Stir to combine, bring to a boil and then reduce to a medium low heat.
  4. Cook until noodles are soft, approximately 10-12 minutes.
  5. Remove from heat and stir in grated cheese.
  6. Serve with more shredded cheese on top.
  7. Enjoy!


Shuga' Mommas

Shuga’ Mommas: Coconut-Lime Chicken and Cabbage-Mango Slaw Tacos

If there’s one thing that I’ve learned about Austinites during my short time here, it’s that they LOVE tacos. In these parts, the sky is the limit. There are authentic Taqueria tacos, traditional Tex-Mex tacos, breakfast tacos, BBQ tacos, Indian tacos, Asian tacos, Thai Tacos… you name it! Chances are, your favorite food likely comes in taco form around here. Though I’ve yet to see a spaghetti and meatball taco, I wouldn’t be too surprised if it popped up on a menu.

The hubs and I have always been big taco fans. They are a quick, easy, and often an inexpensive fix for dinner. While we love traditional Mexican flavors, sometimes it’s fun to mix things up. One of my very favorites consists of sweet potatoes and black beans, while a close runner up is stuffed with butternut squash and goat cheese. Though my mouth is drooling just thinking about these taco favorites, I wouldn’t dare fix them right now amid this hot, Texas summer heat. It’s already a struggle to keep the AC set any higher than 74. There’s no way that I am turning on my oven to roast a butternut squash…

We’ve done a lot of grilling since we’ve been here, and I’ve started to favor those recipes that don’t cause a lot of fuss. Feeling inspired by a Coconut-Mango Chicken Salad recipe that I recently saw, I decided to do as Austinites do and put the taco challenge to the test. I am a sucker for anything coconut, and if you throw mango into the mix, I am sold. I first toyed with this recipe during our first week in town. Our kitchen wasn’t all the way unpacked but I was tired of eating takeout. I was ready to get back to cooking and to explore all of the great ingredients that Texas has to offer.

Though I wouldn’t necessarily say that the flavor of this dish is very Texan, the inspiration certainly is. It consists of some of my favorite ingredients, swirled together, and presented in taco form. It’s a quick and easy dish to cook, and doesn’t bring the kitchen temperature up to an unbearable state. Plus, from start to finish it takes no more than 30 minutes to prepare, making it the perfect go to recipe for those nights when you just don’t have much time (or motivation) to cook.

Coconut-Lime Chicken and Cabbage-Mango Slaw Tacos

Serves 4

1.5 tbsp fish sauce

2 tbsp Sriracha

4 tbsp lime juice (approximately 2 limes)

6 tbsp cream of coconut

Pinch of salt

1 mango, peeled, pitted, and coarsely chopped

½ cup fresh cilantro, chopped

1 ½ cups shredded Napa cabbage

1 ½ lbs boneless, skinless chicken breasts

12 6-in tortillas (I prefer flour)

Quick Pickled Onions (recipe below)

Doss, Coconut-Lime Chicken Tacos 1

Bring 1 cup of water, 1 tbsp of fish sauce, and 1 tbsp of Sriracha to a boil in a 12-inch skillet. Reduce heat to medium-low. Add chicken and simmer, covered, until chicken is cooked through, about 10-15 minutes.

Meanwhile, whisk together cream of coconut, lime juice, and remaining fish sauce and Sriracha in a large bowl. Add your cabbage, cilantro, and mango and toss to coat.

Once your chicken is cooked through, transfer it to a plate and using two forks, shred it into bite-size pieces. Lightly salt your shredded chicken and then add it to your cabbage mixture. Toss until all ingredients are mixed well and your chicken is thoroughly coated. Set aside.

Lightly heat your tortillas between two wet paper towels in the microwave for 15-20 seconds, or for about 5-10 seconds per tortilla in a warm skillet.

Doss, Coconut-Lime Chicken Tacos 2

Fill each tortilla with approximately 3 heaping tbsp of chicken/slaw mixture and top with pickled onions and extra cilantro, lime, and Sriracha if desired.

Quick Pickled Onions

1 small or ½ large red onion, thinly sliced

1 cup white or apple cider vinegar

1 tsp salt

1 tsp sugar

Whisk together vinegar, salt, and sugar in medium bowl. Add onion and let set for at least 20 minutes at room temperature. Drain onion before using.

Doss, Coconut-Lime Chicken Tacos 3

Enjoy!

-From the kitchen of Jennifer Doss, a current graduate wife


Shuga' Mommas

Shuga’ Mommas: Weeknight Mushroom and Kale Pasta

I’m a huge fan of the blog 100 Days of Real Food. (You should check them out if you haven’t). Last week, Lisa posted a wonderful recipe for Mushroom and Kale Pasta. I decided to cook it for my family, and it was a huge hit! Given that it is a vegetarian meal, it’s also extremely cost effective for those of us on a graduate budget!

I’ve included Lisa’s recipe below; the only changes I made was serving gluten free pasta, instead of whole-wheat.

Weeknight Mushroom and Kale Pasta

Serves: 3-4
Ingredients
  • 8 ounces whole-wheat pasta, boiled and drained according to pasta directions
  • 1 ounce dried mushrooms
  • 2 tablespoons butter
  • 2 shallots, diced
  • 3 cloves garlic, minced
  • ½ cup white wine
  • 2 cups loosely packed kale, with big stems removed and cut into strips
  • ¾ cup heavy cream
  • ¼ teaspoon salt
  • Pepper, to taste
  • â…“ cup freshly grated Parmesan cheese
Instructions
  1. In a small pot, add the dried mushrooms and cover with water (minimum of 1 ½ cups). Bring to a boil and cook until the mushrooms have softened, about 3 to 4 minutes. Drain while reserving 1 cup of the cooking liquid. Dice the cooked mushrooms (I do this by using culinary scissors).
  2. In a sauté pan over medium heat, melt the butter. Add the shallots, mushrooms, and garlic to the pan and cook while stirring for 2 to 3 minutes.
  3. Pour in the white wine and turn up the heat so the mixture comes to a boil. Cook until the wine almost completely boils off, about 3 to 4 minutes (if you are doubling this recipe, it will take longer).
  4. Pour in the 1 cup of the reserved mushroom cooking liquid and cook until reduced by half.
  5. Turn the heat back down to medium and add the heavy cream, kale, salt, and pepper to the pan. Cook until the sauce thickens, 2 to 3 more minutes. Fold in the noodles, garnish with Parmesan, and serve.

I hope you enjoy it as much as we did!

~Mandy
Shuga' Mommas

The Lovely Drawer: Pumpkin, Pancetta & Sage Lasagne

Need another pumpkin recipe to get you through the autumn season? Then look no further.

I (Mandy) recently made this for my family, and it was beyond a hit. I love a good lasagne, but don’t eat them very often because they’re so filling! This recipe was so light, that I didn’t mind have an extra helping (or two, but who’s counting). It’s also inexpensive to make, so we thought it was worth passing on to you!

And, please meet Teri, creator of this brilliant recipe. You can find more of her yummy baked goodies and beautiful designs at The Lovely Drawer.

It’s come to that time of year when I’m compulsively pinning pumpkin recipes as though my life depends on it and daydreaming about the smell of roasting squash wafting through my flat. All things considered, it seemed fitting to dig out this tasty dish. 
 
It’s a healthier version of the creamy, oozy lasagne we are all so familiar with. Now let me clarify, this isn’t going to win you lots of diet points but it is ‘better’ for you than most. Seeing as my tummy can’t handle lots of creaminess and I’m no fan of mince (read: ground beef), I’ve ended up with this hodge podge of ingredients which I would say is actually (in my humble opinion) more flavoursome than the old classic. 
 
Plus my husband liked it so much he had the leftovers for breakfast and lunch the next day. I’m not advocating that, but it is impressive! 

To make:
1. Chop up your onion and dice your pancetta (depending on how you’ve bought it) and start to fry them in a pan along with the crushed garlic. Add the sundried tomatoes, most of your sage (chopped), paprika and mixed herbs. Season with salt and pepper.
2. Once cooked stir in the passata sauce and simmer for 5 mins. Set aside.
3. In another pan wilt your spinach and season lightly. When cooked drain the tin of spinach and add to the pan to bulk up the greens.
4. In a bowl, mix the pumpkin with the nutmeg until combined and set aside.
5. Crack and whisk the egg and then in another bowl, beat the egg and ricotta together.

6. Lightly grease your baking dish and then start layering up the lasagne, making sure each layer is spread right to the edge. Place two pasta sheets on the bottom (side by side, overlapping if they don’t fit), followed by a layer of spinach, followed by a layer of pumpkin, followed by another two pasta sheets (side by side), followed by the tomato and pancetta mixture, followed by another two pasta sheets (side by side) followed by the ricotta mixture on top. Make sure the pasta is covered right to the edges. Finish by sprinkling the chedder cheese over the whole thing and scatter the remaining sage.
7. Cook on 190ºC for 25 mins and then place a sheet of baking paper or foil over the top and cook for a further 15 mins and then serve. It tastes really good with a balsamic and rocket (read: arugula) salad.

Enjoy!

~Mandy & M.C.

*Recipe reposted with permission from The Lovely Drawer.

Shuga' Mommas

Shuga Mommas: Tomato and Chickpea Soup with Fresh Basil Pesto

My husband is an avid runner. He’s also very disciplined about how he fuels his body; because of this, we try to eat very healthy in our home (and by we, I mean him) :). As I’m designated head chef in our home, he occasionally sends me recipe suggestions of different things to try so we aren’t eating the same things over and over and over.

Recently, he sent me a link for a tomato based soup with chickpeas, with a jarred pesto topping. To be honest, I thought it sounded a bit bland (not to mention a bit gross, given my love/hate relationship with pesto), and since I was missing several of the ingredients the recipe called for, I decided to switch the recipe around a bit to fit what was in my cupboard.

The result? AH-MAZING. Seriously, it will go on heavy rotation in our home this autumn and winter. It’s vegetarian, easy and inexpensive to make, freezes well, and tastes great. So, if you’re looking for another yummy soup packed with protein and fiber, that fits with a graduate budget, then this is your soup.

TOMATO SOUP WITH CHICKPEAS

Ingredients

  • 2 14oz cans of chopped tomatoes
  • 1 14oz can of chickpeas
  • 1 TBSP of olive oil
  • 2 cloves garlic, mince
  • 1 onion, minced
  • 1 red jalapeno, minced (I wanted a bit of spice in mine, so I added the seeds, but you can adjust to your desired level of spice)
  • 1/2 cup water
  • salt/pepper/sugar to taste

Directions

In a soup pot, sauté garlic, onion, and jalapeno in olive oil until soft. Add both cans of chopped tomatoes and water, and bring to a boil. Reduce heat to a simmer, adding a bit of salt, pepper, and sugar to your desired taste. Add chickpeas, and cook for an additional 10-15 minutes. If you prefer, you can puree this soup with a blender, or leave as is.

We paired the soup with warm French baguettes spread with olive oil and fresh basil pesto. I tend to use this recipe for fresh basil pesto, reducing the garlic to 2 cloves instead of 3 cloves. (I like garlic, but I’ve found this amount almost overpowers the pesto). You can use the pesto as a soup topping as well.

Enjoy!

~Mandy

Shuga' Mommas

Shuga’ Mommas: Blueberry Crisp

A friend recently gave me a copy of a delightful little book called Bread & Wine by Shauna Niequist.  Not only are the short stories in each chapter inspiring and amusing to read, the recipes that are paired with each little story are amazing!  I’ve tried at least 4 of them and they have all turned out wonderfully!  I highly recommend the book.

In one of the first chapters Shauna shares a recipe for Blueberry Crisp.  A recipe her mother taught her and that she now serves every weekend in her home with her own family.  It’s incredibly simple, very healthy (which I love!), and the flavor is amazing.

It’s the perfect recipe for this fall season.  We actually made it with some apples we recently picked at a friend’s orchard, instead of the blueberries. I think it would turn out great with any fruit.  Pair with ice cream and tada!

Enjoy and happy autumn!

-M.C.

Ingredients

4 cups blueberries (or any fruit, really)

Crisp topping:

1 cup old fashioned oats

½ cup pecans

½ cup almond meal (available at Trader Joe’s, Whole Foods, health food stores, or made by putting almonds in food processor until fine, but before they turn to almond butter)

¼ cup maple syrup

¼ cup olive oil

½ tsp salt

Instructions

Pour four cups fruit into 8×8 pan. Spread crisp topping over the fruit. Bake at 350 degrees 35-40 minutes, or longer if topping and fruit are frozen, until fruit is bubbling and topping is crisp and golden.

Serves 4 

Screen shot 2013-09-24 at 7.09.52 PM

image source

Shuga' Mommas

Shuga’ Mommas: Roasted carrot & chickpea salad with tahini dressing

Oh my goodness, this salad is delicious!  Seriously, you’ll be wishing you made a double batch it’s that good.  We had it for a main course and it was perfectly filling.  I’ve only relatively recently gotten into ‘eating with the seasons’ (which is totally the way to go!) and carrots right now are really easy to come by and on a grad wife budget they are super cheap too! You could also easily make this with sweet potato or butternut squash mixed in or instead of the carrots.

The recipe below was taken from a local organic produce cookbook (Riverford Organics) and it’s perfect for your spring and summer dinner parties ahead!  It was quick and easy too.  Enjoy!

Ingredients:

600g carrots, peeled & cut into large chunks (big bag)
2 tbsp olive oil
½ tsp dried chilli flakes
1 tsp cumin seeds
½ tsp ground coriander
¼ tsp smoked paprika
1 tbsp clear honey
mixed salad leaves packet
1 tin chickpeas, rinsed & drained

for the dressing:

2 tbsp light tahini
2 tbsp plain yoghurt
1 garlic clove, crushed
2 tbsp olive oil
juice of 1 lemon

Directions:

Preheat the oven to 200°C.

Toss the carrots in a baking dish with the oil, chilli, cumin, coriander and paprika.

Season with salt and pepper. Roast for 30-40 mins, until tender.

Remove from the oven and toss in the chickpeas, coating them with the spices. (I put them back in to roast a few more minutes because I like roasted chickpeas-althought that wasn’t in the original recipe)

Leave to cool slightly. Scatter the salad on a long serving plate, and then put the chickpeas and carrots on top. Make the dressing: stir the tahini with the yoghurt until you have a smooth paste. Whisk in the rest of the ingredients with a few tbsp water, just enough so the dressing has the consistency of pouring cream. Drizzle over the salad.  Enjoy!

-M.C.

Screen shot 2013-05-02 at 3.02.56 PMimage source here


Shuga' Mommas

Shuga’ Mommas: Thai Beef Cabbage Cups

I was in the mood for a bit of Thai food the other night, and I ran across this recipe from Cooking Light, so decided to try it. I’m not usually that adventurous when it comes to making Asian food (anything made with fish sauce tends to throw this Midwest Missouri girl), but since I really wanted to try this recipe, I forged on.

It was a huge hit in our house. The recipe is simple, inexpensive, and the leftovers were great!

credit

Ingredients:

  • 2 1/2 teaspoons dark sesame oil, divided
  • 2 teaspoons minced peeled fresh ginger
  • 3 garlic cloves, minced
  • 1 pound ground sirloin
  • 1 tablespoon sugar
  • 2 tablespoons fresh lime juice
  • 1 1/2 tablespoons fish sauce
  • 1 tablespoon water
  • 1/4 teaspoon crushed red pepper
  • 1/2 cup vertically sliced red onion
  • 1/2 cup chopped fresh cilantro
  • 8 large green cabbage leaves
  • 2 tablespoons finely chopped unsalted, dry-roasted peanuts

Preparation

  1. Heat a large nonstick skillet over medium-high heat. Add 2 teaspoons oil to pan; swirl to coat. Add ginger and garlic; cook 1 minute, stirring constantly. Add beef; cook 5 minutes or until browned, stirring to crumble.
  2. Combine remaining 1/2 teaspoon oil, sugar, and next 4 ingredients (through pepper) in a large bowl. Add beef mixture, onion, and cilantro; toss well. Place 2 cabbage leaves on each of 4 plates; divide beef mixture evenly among leaves. Top each serving with 1 1/2 teaspoons peanuts.

A couple of notes:

  • If you don’t like cabbage leaves, you could substitute rice. I made both, and it was wonderful.
  • I sauteed the onion before mixing it with the beef.

Enjoy!

-Mandy

Shuga' Mommas

Shuga’ Mommas: A Little Bit of Winter Comfort

I am always amazed (and then reminded!) that I start to crave rich, warm food when winter kicks in. I find myself trawling the internet for soups, casseroles, and savoury pies; really anything that will match the chunky sweater and scarf I’m wearing, and well, keep me warm.

One of our go-to winter meals is Chicken Pot Pie. It’s easy to make, it freezes well, and frankly, it tastes good. I received this recipe from one of my friends, and at the bottom of the recipe was this statement: It’s not going to make anyone skinny, but it is good.

And she is right.

Chicken Pot Pie 

Ingredients:

  • 3/4 cup butter
  • 1/2 cup onion, chopped
  • 1-2 ribs celery, chopped
  • 3/4 cup flour
  • 3 cups chicken broth
  • 1 1/4 cup milk
  • 1/4 tsp salt
  • 1/4 tsp pepper
  • 3/4 tsp poultry seasoning (or seasoning salt)
  • 1/2 tsp hot sauce
  • 4 cups cooked chicken, shredded or cubed
  • 3/4 cup carrots, diced and cooked
  • 3/4 cup frozen peas

Melt the butter in dutch oven (or large pot), add the chopped onion, and chopped celery. Saute over medium heat for 3-5 minutes are until veggies are soft.

Add the flour to the butter mixture, along with the chicken broth, milk, salt, pepper, poultry seasoning, and hot sauce. Increase heat to just below boiling, then add cooked chicken, carrots, diced and peas. Stir constantly until thick, 3-5 minutes. Pour into a deep pie plate or oval casserole and top with puff pastry, tucking edges into the side to prevent boiling over. (Pie crust is fine too but not as fluffy/yummy – here’s a great gluten free option.) Bake at 400F (200C) for 30-40 minutes.  Be sure and place the pie plate on a cookie sheet to catch any overflow.

Credit

What’s your favourite winter dish?

~Mandy