Shuga' Mommas

Shuga’ Mommas: Chocolate Chip Banana Bread

Oh, graduate wives. I have failed you.

Today’s lovely post was supposed to have photographs, yes, BEAUTIFUL photographs of Chocolate Chip Banana Bread. Instead, this is what you get:

Batter batter everywhere!

I love to bake. Sometimes, the things I bake turn out so well, I start to get a bit prideful. (Go on, tell me I’m a great baker). And, it would have to be today, of all days, a day when chocolate chip banana bread should be photographed in all its gorgeousness, that this batter decides it has a mind of its own. “SEE!! You can’t put me in a bread pan! I will get out!” Personally, it was great reminder that I’m not Martha Stewart.

But, on most days, I can make a mean Chocolate Chip Banana Bread, and now, you can too!

CHOCOLATE CHIP BANANA BREAD

  • 1/2 cup butter, softened (use real butter, I promise it’s better)
  • 1.5 cups sugar
  • 2 egg yolks, beaten
  • 3/4 tsp baking soda
  • 1/2 cup milk
  • 2 egg whites
  • 2 bananas (one mashed, the other diced)
  • 1/2 tsp salt
  • 2 cups flour
  • 1/2 tsp baking powder
  • 1 tsp vanilla
  • I pkg of chocolate chips (frozen)

Pre-heat oven to 350F (180C).

Roll chocolate chips in flour. When baking, this will keep them from sinking down to the bottom of the pan.

With mixer (hand or stand) cream butter and sugar. Add egg yolks. In a separate bowl, stir baking soda into milk. Add to butter, sugar, and eggs. Add the mashed banana. Combine salt, flour, baking powder, and add to mixture. Stir in vanilla. Beat egg whites and fold into mixture. Add chocolate chips and diced banana. Bake for one hour.

And, please send me photos of your fabulous bread once you’ve baked it. I need to be reminded of what it’s supposed to look like.

Happy baking!

Mandy

PS You can omit the chocolate chips for some awesome banana bread.


Shuga' Mommas

Shuga’ Mommas: Carrot and Coriander Soup

Autumn is my favourite time of year. It invokes fond memories of high school football games, pumpkin carving, warm sweaters, apple cider, falling leaves, crisp mornings, and the smell of cinnamon.

I know you didn’t come here to read about the nostalgia of my childhood, so let’s talk about why you came by here today: soup.

Growing up, I didn’t particularly like soup. Now that I am older (and wiser), and living in a colder climate, soup seems like a must. There is nothing better or more filling than a warm bowl of soup on a cold day.

After moving to England, one of my friends introduced me to Carrot and Coriander soup, and our family fell in love with it immediately. It’s cheap. It’s easy. It’s healthy. It freezes well. What more could you ask for when time AND money are precious things in this graduate wife life?

CARROT AND CORIANDER SOUP   (This is my own variation of several recipe attempts)

  • Extra virgin olive oil
  • 1 medium onion
  • 1lb carrots
  • 3/4 tsp of ground coriander
  • 32 oz of vegetable stock (can use more, if you’d like it a bit more soupy)
  • Handful of coriander (the English fancy pants word for cilantro – for you North Americans)
  • Salt and pepper to taste
  • Cheese (cheddar, gruyere, parmesan etc whatever you like)

Slice carrots and onion, and saute on high for a few minutes until soft. Sprinkle with 3/4 tsp of ground coriander, stirring until carrots and onion are coated. In a separate stock pan, turn vegetable stock on low. Throw carrots and onion into stock, and cover, allowing it to simmer for 30 minutes. Remove cover. Add handful of coriander, salt and pepper. The soup is now ready to be puréed. You can either use a food processor on an immersion blender (I prefer immersion blender). Blend until soup is smooth. Divide soup into bowls (this recipe will serve 4), and sprinkle with cheese. Add a side of warm bread (garlic, french) to complete the meal!

Carrot & Coriander Soup

And, as my husband’s French grandfather would say, “bon appétit!”

Here’s to a delicious autumn,

Mandy

Shuga' Mommas

Shuga’ Mommas: Red Wine Chicken (an anti-recipe)

Written by Tori – a former graduate wife

This dish is so easy and delicious.  I really can’t call it a recipe, because you can adjust all of the measurements and even the ingredients to your particular taste.  It is great to make for guests, or for a treat when your hubby needs a break from the studies.  We love it!!

Directions:

  • Two boneless chicken breasts, split down the middle (sliced while standing on one side, so you now have four thin cutlets), and sprinkled with salt and pepper.
  • Heat couple of Tablespoons of olive oil in a pan, and brown the chicken on each side.
  • Slice half of a yellow onion and two large cloves of garlic, adding to the pan with the chicken until the onions begin to soften.  If you like mushrooms, this would be a great time to throw some in as well.
  • Sprinkle the top of each chicken breast with around a 1/2 Tablespoon of brown sugar, and then add around 1 cup of red wine (I used a malbec, which was delicious, but you don’t need anything expensive!  I do not recommend “cooking wine”, but any cheap wine that you would actually drink is perfect).
  • Baste a little of the wine and onions over the chicken, cover, and let simmer for at least 15 minutes.  Give it a taste, adding more salt and pepper as needed- or maybe you want a little more brown sugar!  Be careful- it gets sweet quickly!
  • If you want the sauce to thicken up remove the lid to help it reduce down, or whisk in a teaspoon of cornstarch.

Simply boil some pasta, and when it has about a minute left, toss in fresh broccoli so that it became bright green and crispy-tender.  Drain it, cover it with butter and salt, and pour the chicken and wine sauce over it all.


Shuga' Mommas

Shuga’ Mommas: Homemade Granola

Doing the grocery shopping on a grad wife budget, do you ever find yourself drooling over the fancy pants granola and museli at the grocery?  I sure do.  I ‘ooh’ and ‘ahh’ at the pretty little packages and all the yummy granola mixes with every possible dried fruit known to man and loads upon loads of delicious nuts.

I mentioned before that the kitchen is not my forte, and I can assure you that this super easy recipe comes out flawless every time!  No more wishing, follow these directions and make your own mouth watering granola at home!

I usually double the recipe so we can eat it for a while or I like to put the extra in a cute glass container and share some as a gift. p.s. it also makes a wonderful study snack to send to the library with your hubby.

You can add almost anything to this recipe to give the granola some extra flair.  Try chocolate chips (but only when cooling) or sunflower seeds or dried apricots.  Be creative with what you have you laying around the kitchen. Yumm!!

Ingredients:

5 cups of old fashion oats (not quick)

1.5 cups of oat bran

¾ canola oil

¾ honey

Raisins, nuts, etc.

salt, cinnamon, nutmeg or any other flavors desired!


Directions:

Spread the mixture evenly over a large rectangle baking sheet

+Bake at 350 for 6-8 minutes

+Slide sheet out of the oven and try gently flipping it with a spatula

+Bake for another 6-8 minutes

+Take out and let it cool for 30 minutes before breaking up

=Deliciousness!

Shuga' Mommas

Shuga’ Mommas: Homemade Pizza Dough

Written by Tori – a former graduate wife

re-posted from FoodLoveProject

.I truly love making homemade pizzas.  I get to have complete control over my ingredients, so I can use whole wheat flour if I’m feeling healthy, and I can use whatever toppings I happen to have on hand and throw them all together on a crust.  Also, I can make them any messy shape I want to, and call it “rustic”.  Plus, while I usually let the mixer do all the work, kneading by hand can be a great zone-out time.  Or, I can enjoy the time with my hubby doing the prep work when he is free from the library and on those late nights with hours of studying ahead, who doesn’t love homemade pizza?!

The Ingredients:

  • 2 1/4 teaspoons dry active yeast (or 1 packet)
  • 1 1/2 cup warm water (specifically, 120 degrees F. It needs to be warm enough to activate the yeast, but not hot)
  • 3 1/2 to 4 cups all purpose flour, plus additional for rolling
  • 2 teaspoons kosher salt
  • 1 Tablespoon honey
  • olive oil

The process: By hand or with a mixer

  • Pour the warm water into your mixing bowl, add honey, sprinkle the yeast, stir, and let it rest for 5 minutes
    • When you come back, the mixture should be frothy.
    • Sift half of the flour over the yeast mixture and mix just until smooth – with a wooden spoon or with your dough hook attachment.
    • Add salt and remaining flour.
    • If you are using a mixer with a dough hook attachment, turn the machine on medium speed and let it knead for about 5 minutes, or until it is very smooth.  If necessary, add more flour a tablespoon at a time so that the dough pulls away from the side of the bowl.  It should be tacky, but not wet enough to stick all over your hands.
    • If you are kneading by hand, lightly flour your counter or board, and knead by 1.) pressing out with the heel of your hand, 2.) folding the dough in half, and 3.) turning 1/4 of a turn. Repeat until the dough is very smooth (about 5 minutes)
    • Keep adding flour as necessary to prevent it from sticking all over your hands.  Add slowly, though! It should still be a little bit tacky.
    • Grease a bowl with olive oil and place the dough in the bowl to rest.  Cover with plastic wrap or a kitchen towel.
    • Let the dough rest in a dark place for about an hour and a half, or until it has doubled in size.
    • Once it has finished rising, punch out all the air and let it rest for 15 minutes (if you don’t let it rest, it will be way too elastic to form into a large crust).
    • Either divide it into 4 personal pizzas, or make a big one!  You can use a rolling pin, stretch it on your fists, push it out with your fingers…whatever you want.*if you find that the dough keeps springing back on itself, just walk away for 5 minutes, let it rest, and then come back and stretch it again.
    • Cover with toppings, drizzle the crust with olive oil to make it nice and golden, place on a hot pizza stone or a well oiled cookie sheet, and bake at 425 degrees F for 12 minutes.
    • ENJOY! Yumm

Shuga' Mommas

Shuga’ Mommas: Iced Sugar Cookies

Who doesn’t love a good sugar cookie? And, with the added bonus of icing?

I know I do. But, I love sugar. The love affair began at a young age, and although I’ve managed to reign it in quite a bit over the years (mostly because of a failing metabolism), I still enjoy probably more than my fair share.

I’ve tried several sugar cookie recipes, and have finally tweaked a foolproof one…. one that I love, and one that loves me back. And, you can never go wrong if you find a recipe that loves you back. You need all the lovin’ you can get when you’re a graduate wife.

SUGAR COOKIES

  • 1.5 cups of butter (Note: use real butter – yes, I have an obsession with using real butter)
  • 5 eggs
  • 2 cups of sugar
  • 1 tsp of vanilla extract
  • 2 tsp of baking powder
  • 1 tsp of salt
  • 4.5 cups of flour

With a mixer (hand or stand), cream butter and sugar till smooth.

Beat in eggs, vanilla, baking powder and salt. Add flour and combine. Cover and chill dough in refrigerator for 2 hours, or even overnight! (Note: for less mess, I use a glass/plastic bowl to do all my mixing in, slapping a lid on top so it goes straight from mixing into the fridge).

Once dough has chilled, roll dough onto floured surface into 1/4 inch to 1/2 inch thick. Use cookie cutters to cut into shapes. (The ones photographed below are from a recent baby shower).

Preheat over to 400F (200 C), and bake on ungreased cookie sheet for 5-7 minutes. Do not let them get brown.

Once cookies have baked, cool on racks or wax paper.  DO NOT ICE until completely cooled.

ICING

(I would like to point out that while I enjoy baking, I am less than amateur when it comes to icing and decorating cookies. I definitely think there is a cake/cookie decorating class in my future)!

  • 1.5 cups of confectioner’s sugar (or icing sugar in the UK)
  • 1 tsp of vanilla extract
  • a dash of almond extract (or if you prefer the icing to have a bit more of an almond flavor, add more – I usually add 1/2 tsp)
  • 3 tablespoons of butter
  • 1 tablespoon of milk (can add more, depending on the desired icing consistency)

Cream sugar and butter with mixer (hand or stand). Combine rest of ingredients till smooth. Depending on the consistency of your icing, you can either ‘paint’ your cookies, or just glob on loads of icing. I chose to paint my cookies, rolling on the icing till smooth, allowing them to dry over night.

For the baby shower, I made 2 batches of icing, dividing them into 2 separate bowls. Once divided, I added 1 drop of red food coloring in one bowl to make pink icing, and 1 drop of blue food coloring in the other bowl to make light blue icing. I used a decorating bag with a round tip 12 for the piping.

This is where your creative side can come in! You literally can take this recipe and use it for ANY occasion….Christmas, Halloween, birthdays…the sky is the limit!

Enjoy!

-Mandy

Shuga' Mommas

Shuga’ Mommas: Sour Cream Pound Cake

.

When I was living in Atlanta, I had a very dear elderly southern woman give me her recipe for Sour Cream Pound Cake. I was so excited to try to emulate her amazing recipe, and felt honored that she would pass it on to me, so I could enjoy it wherever this graduate wife journey took me.

Ahem.

After dozens of failed attempts at baking my friend’s lush Sour Cream Pound Cake, I concluded that she had left out several ingredients and given incorrect measurements. Part of me wanted to believe that her memory just simply left certain things off the recipe; the other part of me believed that she may have done it on purpose, holding on to the fact that sometimes recipes this good should go to the grave. Tragedy for those of us left behind!

Anyway, after my dozens of failed baking attempts, I finally tweaked the recipe to what I considered fit for consumption. Actually, it’s better than that, and I almost didn’t want to share it…..but, alas, I should not be like my friend.  It’s quickly become one of my favorite cakes, even though I’m pretty sure my arteries clog every time I bake it. I’ve limited myself to baking it a few times a year, and it’s a total treat!;

.

SOUR CREAM POUND CAKE

*1 Cup of Butter (note: REAL BUTTER. Not margarine, not low-fat. This will alter the taste).

*3 Cups of Sugar

*6 Large Eggs

*3 Cups of Flour

*1 Cup of Sour Cream (note: FULL FAT SOUR CREAM).

*1 1/2 Tsp of Almond Extract

*1 Tsp of Vanilla Extract

*1 Tsp of Baking Soda

Pre-heat oven to 325 F.

Allow butter to soften to room temperature. Cream butter and sugar with electric mixer (hand-held or stand alone) until blended. Add eggs one at a time, beating after each addition.

In a separate bowl mix flour and baking soda together.

Add the sour cream to the butter, eggs and sugar mixture. Once blended, add the flour mixture. Blend until batter is smooth. Now add the vanilla and almond extract.

This batter will make 2 loafs, if you choose to bake them in a bread pan; or if you wish it to be round, then will make 4 cakes. It does freeze well. Be sure and only fill half the pan with the batter. If not, you’ll have a massive overflow in your oven.

Bake for 1 hour, or until brown on top.

This cake is best served with fresh berries, whipped or clotted cream, and a cocktail cup of coffee/tea.

-Mandy

PS – This may be delicious, but it is not healthy. Eat at your own risk. 

Shuga' Mommas

Shuga’ Mommas: Peanut Butter Cookies


So…cooking isn’t exactly my strong point.

With an incredible mom who caters on the side, a chef sister-n-law who makes everything taste delicious, my best friend Alicia who can bake up a storm and quite a few friends here in Oxford with a knack for presentation…you’d think I would have gotten more into it.  The tricky part for me is that I absolutely love to host people.  I love having people over or gathering people together in our tiny flat.  This is especially important during this season as we all try to foster community among other graduate wives or among our husband’s departments, etc.  The recipe to a good evening of fellowship almost always involves something yummy thrown into the mix.

I’m thankfully not a terrible cook and am overall usually pleased with what comes out of our wacky and unpredictable little British oven.  However, baking isn’t always that easy and when I came across this super simple recipe, I was intrigued.  I tried it out and brought the cookies to a committee meeting the other night.  Two people commented that they were the best peanut butter cookies they had ever eaten.  Really?  Maybe it was late and they were just being nice, but I sure was grateful.

I found the recipe in the book 4 Ingredients.  Apparently, it was a big hit in Australia and the UK and I picked it up at The Works for a few pounds.  It is really great!  If you are a graduate wife with a budget and a time crunch, I’d recommend it.  The below recipe would also be perfect for little ones to help with since it is so simple.  Enjoy!

PEANUT BUTTER COOKIES

{Makes around 20. Gluten free and glorious! (as the book says) }

  • I cup (260g) crunchy peanut butter
  • 1 cup (220g) brown sugar
  • 1 tsp. cinnamon
  • 1 egg

Pre-heat oven to 180 C.

Mix all ingredients in a bowl.

Spoon small tablespoon sized balls onto lined baking sheets.

Slightly flatten with a fork – crisscross style.

Bake for 8 mins. or until a thin crust appears on cookie.

Shuga' Mommas

Shuga’ Mommas: Chicken Noodle Soup

.

The Graduate Wife is delighted to announce a new series featuring budget & time friendly recipes for you and your family!  We hope these posts bring many a happy belly.  If you would ever enjoy submitting just send us an email!

.

Written by Tori – a current graduate wife

As a trained chef, mom “on-the-way”, and the wife of a graduate student, I feel I have a great responsibility to feed myself and my husband delicious, healthy meals, and spend as little money as possible on groceries!  I love to use coupons and get freebies whenever possible, but depending on where you live, I realize that isn’t always easy.  I find myself in a huge internal debate every time I stand in the meat section, wondering if I should buy the organic chicken (yes, I should), or buy the chicken that’s on sale- I mean, I have spent hours matching up coupons with store sales, haven’t I? I can’t spend $12 on a few chicken breasts and ruin all my hard work, right? (I haven’t come up with a good answer yet).

Sometimes when I leave the store and my master coupon scheme hasn’t worked as well as I had planned, I feel like crying.  Is that normal?  Either way, I feel like I am not even capable of doing my job well (don’t even get me started on what happens when I “overcook” dinner!).

I like to imagine that I am not the only one that feels this way about shopping and cooking.  Because of that, I am sharing a delicious, simple, and budget friendly Chicken Noodle Soup recipe.  Chicken Noodle Soup isn’t the most glamorous or exciting meal, but it is such a comfort food: perfect for all you graduate wives far from home.

This recipe and the prices are not precise, as I don’t write them down.  Keep in mind that the amounts are estimates, and I was cooking for 2 only.

Here’s what you need:

  • Chicken: I pulled two breasts right out of the freezer – – $2 (you caught me- it’s obviously not organic)
  • 4-5 cups of Chicken Broth or Stock – – $ Free! (See below*)
  • Noodles of your choice: ½ a box – – $1 (Can be free, easily, if you have a sale and a coupon!)
  • 1 large carrot, thinly sliced
  • ½ of a yellow onion, diced
  • 1 large clove of garlic
  • 1 tablespoon of olive oil
  • Salt, pepper

Total: less than $5


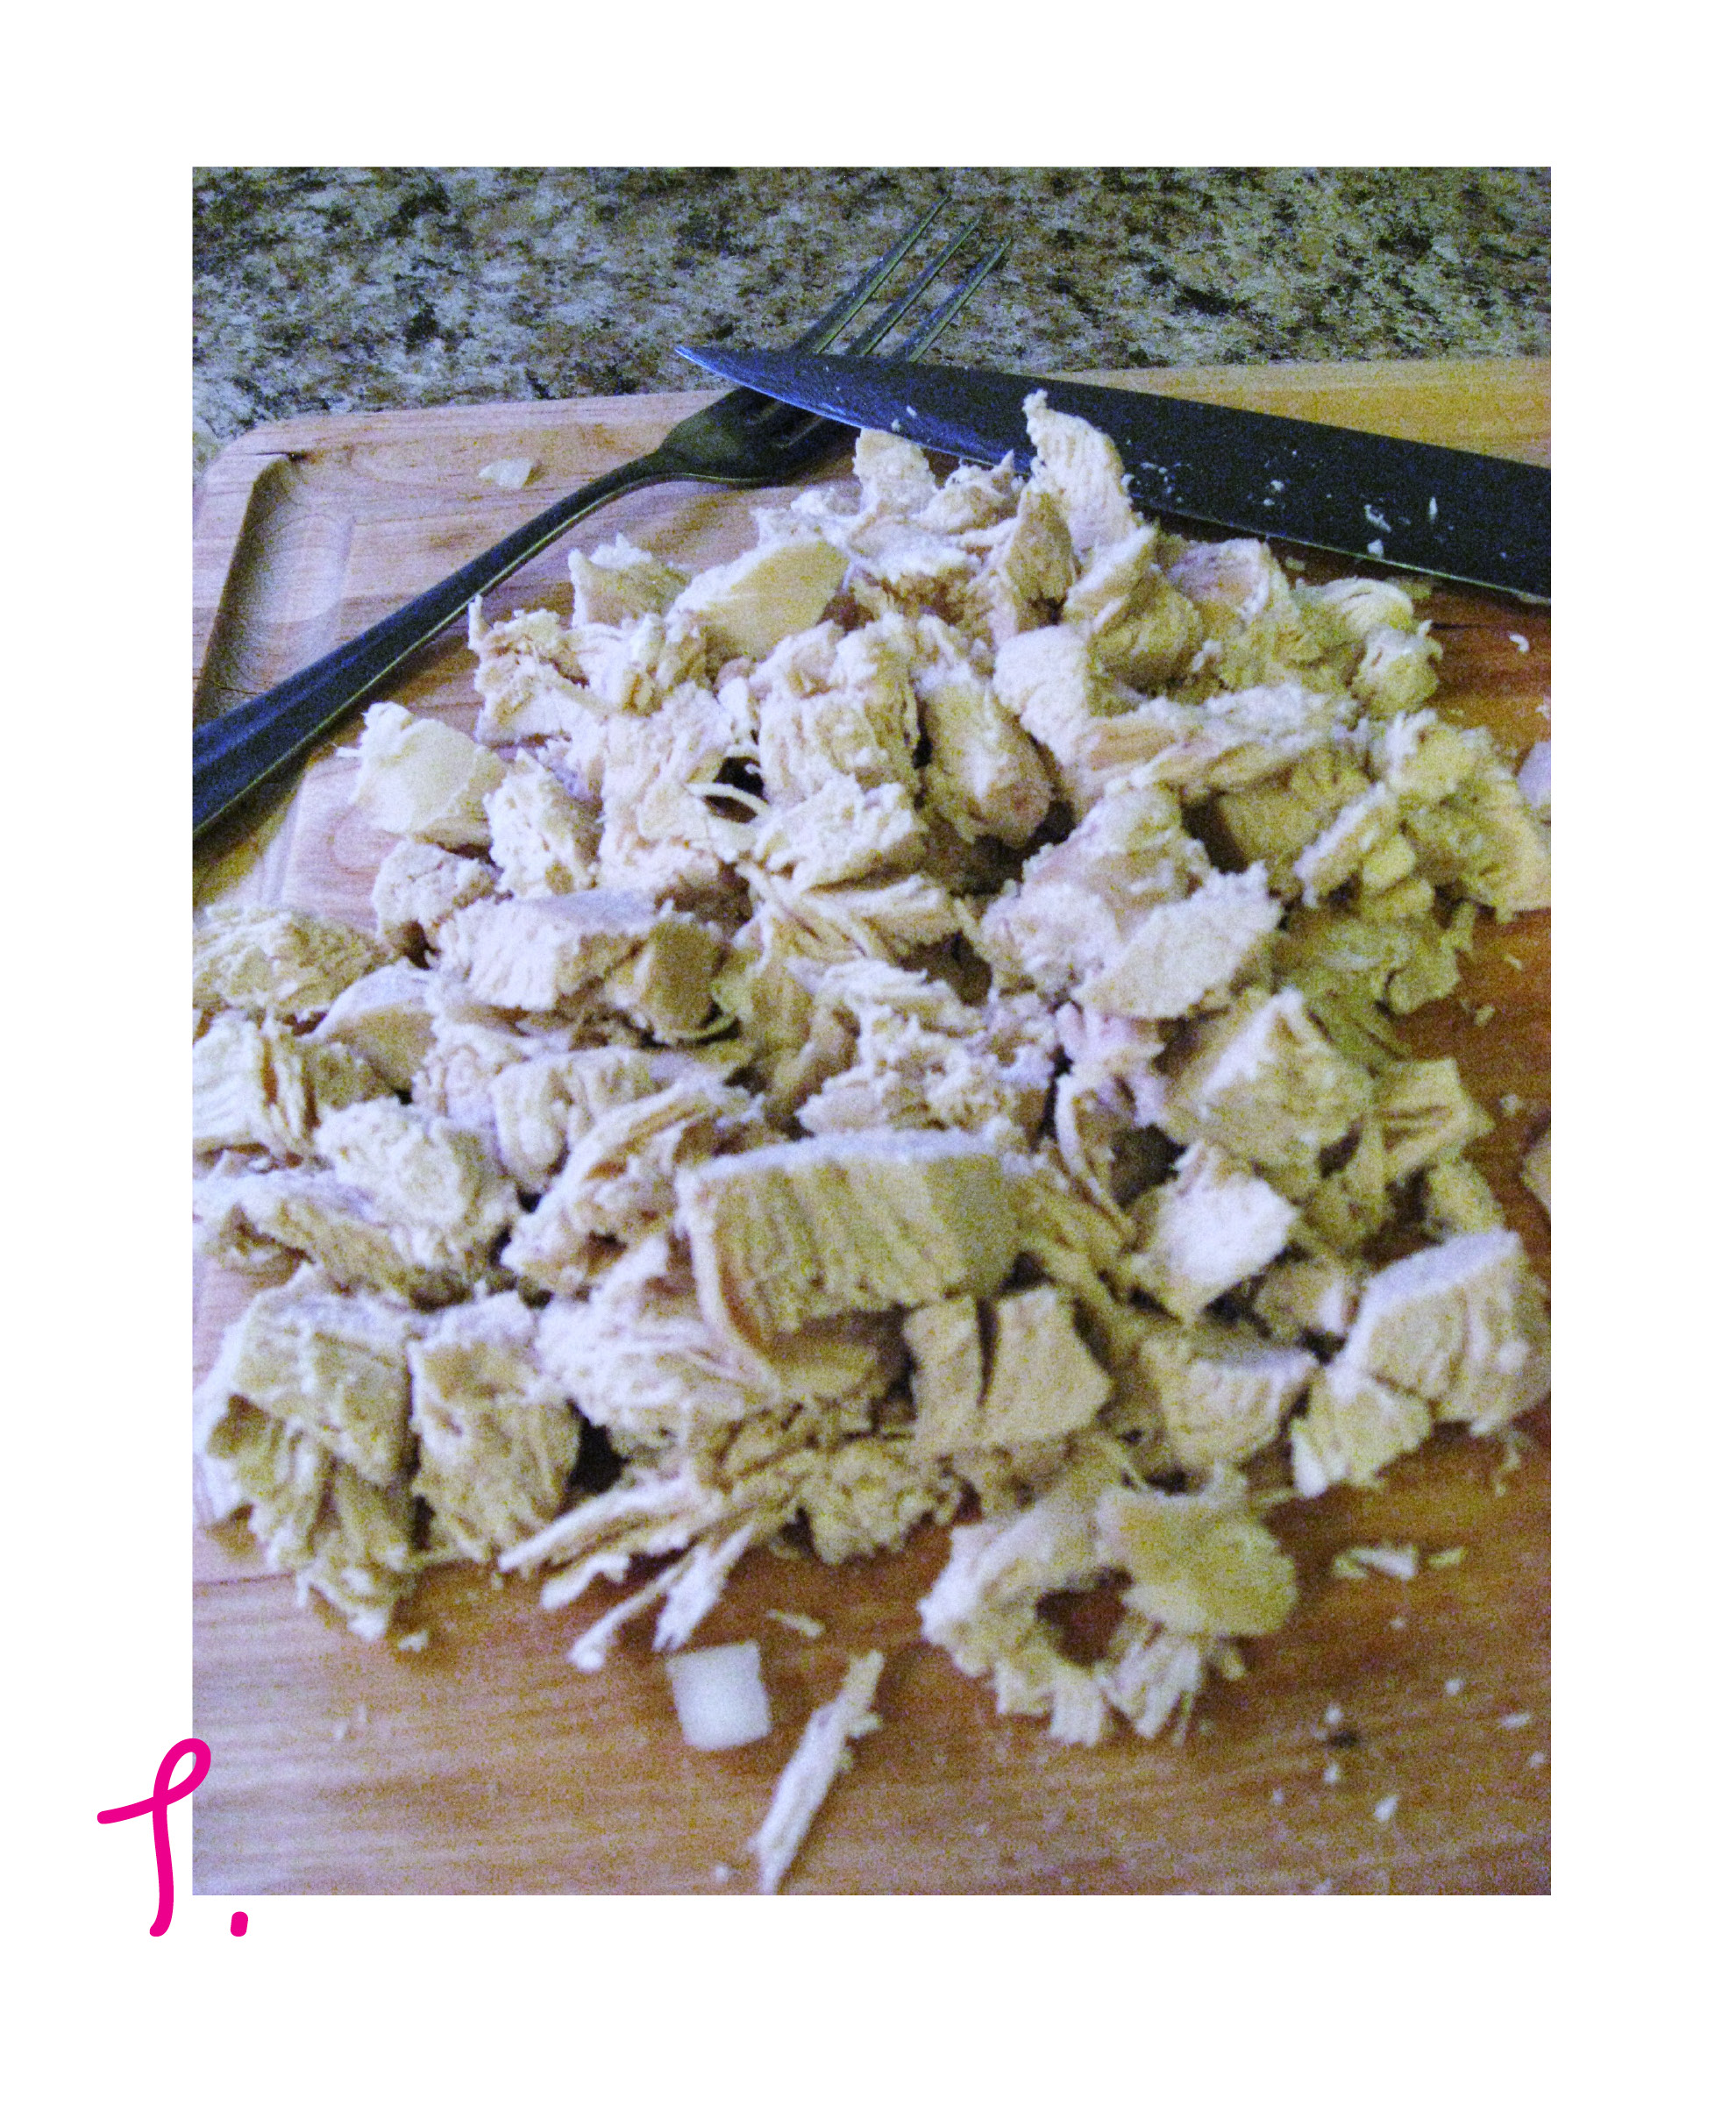
Step 1: 
Place the whole chicken breasts in a pot of water and boil for 15 minutes or until cooked (no need to thaw).  Remove from the water, and chop or shred with a knife and fork. Set aside.

Step 2:  Boil the noodles in a fresh pot of water until almost done- it’s good to leave them a bit firm and let them finish cooking in the soup!

Step 3: Heat your chicken stock in a pot on medium heat; to a simmer (either store bought or homemade*)

Step 4:  Dice the onion, carrot, (a stalk of diced celery if you have it- I was all out) and garlic.  Heat olive oil in a pan over medium heat, and add the onions and carrot and a good sprinkling of salt and pepper.  Sautee the vegetables until tender, and then add the garlic (always add the garlic toward the end of cooking, as it burns easily)

Step 5:  Add all ingredients together in the pot of chicken stock, let simmer for 5 to 10 minutes, and voila!

~If you have a can of peas or corn, toss them in at the end!

Serve with toast or crackers

*When I buy chicken, I often buy bone-in chicken breasts.  They are always cheaper than boneless/skinless breasts, and I use the bones to make homemade stock.

When you get home with the chicken, slice the meat off of the bone, and add the bones to a pot of water, just deep enough to cover.  If you have a carrot, a stalk of celery, half of an onion, and a bay leaf, toss them in, too.  No need to chop anything.  Cover this pretty mixture with a lid, and let it gently simmer on low-medium heat for a few hours.  The longer it simmers, the richer it will taste- but be careful not to let it boil dry!  This should be a gentle process. 

I store the broth in plastic containers in the freezer and pop them out when I’m ready to cook!